
This document describes how the handheld scanner enables you to perform the following functions within Connect.
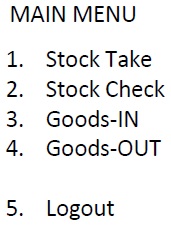
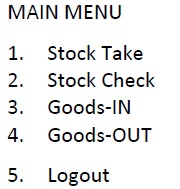
- Stock Take
- Stock Check
- Goods In
- Goods Out
All functions are performed in real-time meaning your stock data is updated immediately ensuring maximum accuracy at the point of scanning.
Important: You MUST log out after each use otherwise the scanner does not drop the session correctly. If you turn the scanner on and it’s not responding or the menu looks corrupted, this is the cause. To remedy, shut down the Connect software, hold 7+9+pwr on HHSD, power HHSD off then on, restart Connect
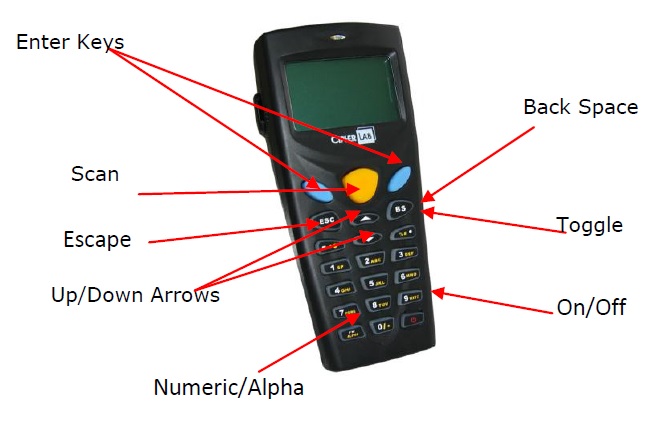
Settings
This device will usually be shipped pre-configured; therefore access to the system settings menu will not be necessary. However, If settings need to be changed, please refer to the technical manual.
[su_divider]
Logging In
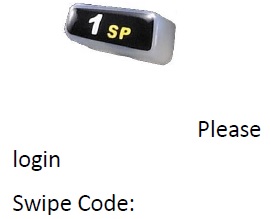
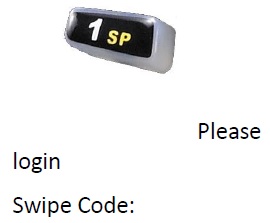
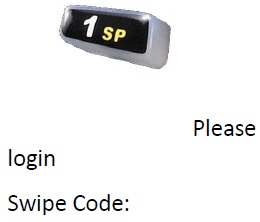
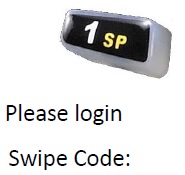
Press ‘1’. Take Data.
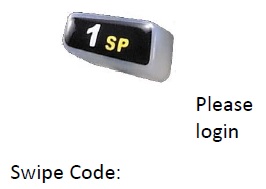
You will be taken to a login screen. Enter in your ‘Swipe Code’, then ‘Enter’.
(Your swipe code is the same as the one that logs you into the till. If no swipe code has been assigned to a staff member login, please refer to adding Swipe Code guide ).
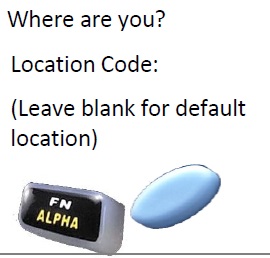
Enter your location. this is the short name as saved in your ‘Stock Locations’ in Back Office, however if you are at your default location, just press ‘Enter’.
You can change to alpha mode by selecting the bottom left-hand side button on the keypad named ‘ALPHA’.
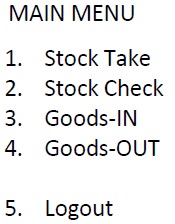
You Are Now Logged In.
[su_divider]
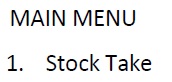
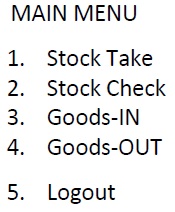
Main menu
After logging in, you will be taken to the Main Menu Screen.
[su_divider]
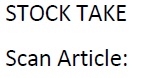
Performing a Stock Take
Login as per the instructions on page 2 of this guide.
Press ‘1. Stock Take’ on the Main Menu to start a Stock Take.
Scan the article you wish to stock take. (Press the yellow button in the centre).

If you scan a barcode that is used for more than one article, a list will appear on screen.
Use the arrows, to page up and down or the corresponding numbers to select the correct article.
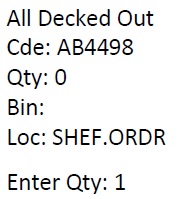
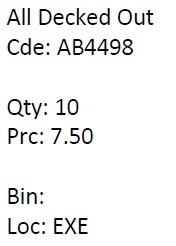
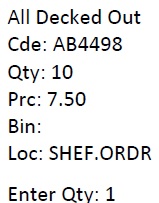
The article name, code, quantity, price, bin and location will show on screen.
To view more of an article’s description, use the toggle button located on the # key on the keypad. This will also switch between the article code and suppliers product code.
Use one of the two following methods;
- Enter stock quantity using number keys, followed by ‘Enter’.
- Scan each product of one type to increase the quantity followed by ‘Enter’.
You now have the option to scan more articles and enter in quantities. (using the yellow button in the centre).
To finish the stock take, press ‘ESC’. This will return you to the Main Menu.
[su_divider]
Performing a Stock Check (ALU on Connect)
A Stock Check can be carried out for the following reasons, if a price is required on an article, or also as a quick check to view the quantity of a particular article in stock at a specific location.
Login as per the instructions above.
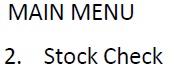
Press ‘2. Stock Check’ on the Main Menu to start a Stock Check.
Scan the article you wish to stock take (Press the yellow button in the centre).

Note: If you scan a barcode that is used for more than one article, a list will appear on screen.
Use the arrows, up and down or the corresponding numbers to select the correct article.
The details of the article are displayed on screen.
To view more of an article’s description, use the toggle button located on the # key on the keypad. This will also switch between the article code and suppliers product code.
To check the next article, scan it (using the yellow button in the centre) and the details will appear once again on screen.

To finish the stock check, press ‘ESC’. This will return you to the Main Menu.
[su_divider]
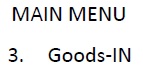
Goods-in
Login as per the instructions above.
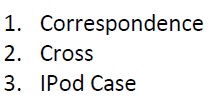
Press ‘3. Goods- IN’ on the Main Menu to start a Stock Take.
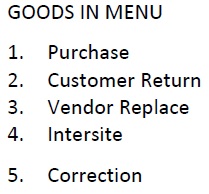
You will be taken to the Goods-IN menu screen.
The Goods-IN reasons in this menu are exactly as they are shown in your Active Stock Tree in Connect. Pressing any of the numbers 1-4, will take you to the next screen.
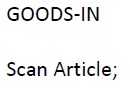
Scan the article you wish to stock take. (Press the yellow button in the centre) If you scan a barcode that is used for more than one article, a list will appear on screen.
Use the arrows, to page up and down or the corresponding numbers to select the correct article.
The details of the article will show on screen.
To view more of an article’s description, use the toggle button located on the # key on the keypad. This will also switch between the article code and suppliers product code.
You now have the option to scan more articles and enter in quantities. Use one of the two following methods;
- Enter stock quantity using number keys, followed by ‘Enter’.
- Scan each product of one type to increase the quantity followed by ‘Enter’.
To finish Goods-IN, press ‘ESC’. This will return you to the Main Menu.
[su_divider]
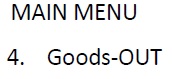
Goods-Out
Login as per the above instructions.
Press ‘4. Goods- OUT’ on the Main Menu to start a Stock Take.
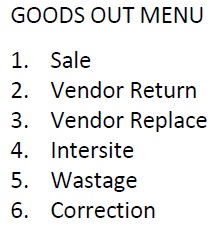
You will be taken to the Goods-OUT menu screen.
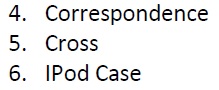
The Goods-OUT reasons in this menu are exactly as they are shown in your Active Stock Tree in Connect. Pressing any of the numbers 1-6, will take you to the next screen.
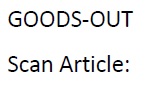
Scan the article you wish to stock take. (Press the yellow button in the centre) If you scan a barcode that is used for more than one article, a list will appear on screen.
Use the arrows, to page up and down or the corresponding numbers to select the correct article.
The details of the article will show on screen.
To view more of an article’s description, use the toggle button located on the # key on the keypad. This will also switch between the article code and suppliers product code.
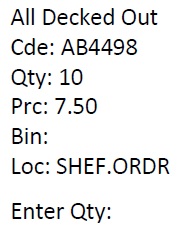
You now have the option to scan more articles and enter in quantities. Use one of the two following methods;
- Enter stock quantity using number keys, followed by ‘Enter’.
- Scan each product of one type to increase the quantity followed by ‘Enter’.
To finish Goods-OUT, press ‘ESC’.
This will return you to the Main Menu.

[su_divider]