
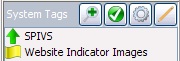
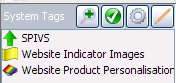
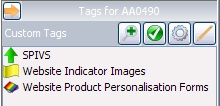
System Tags comprise of SPIVS (Sales Performance Incentives), Website Indicator Images and Website Product Personalisation Forms.
Website Indicator Images can be added to articles to allow indication of a specific feature on the website, for instance ‘New’ or ‘Star Buy’ could appear as a small image attached to an article. Default website indicator images are set, however custom tags can be created.
Website Product Personalisation Forms enables the customer to your website to complete a short form for articles that can be personalised. A default form ‘Standard Product Form’ is set although custom html forms and tags can be created.
SPIVS (Sales Performance Incentives) are added to articles. This is an incentive programme tool designed to improve sales performance, there are default SPIVS that you can attach or you can create your own custom tags.
Website indicator images;
Website Indicator Images are found in the System Tags area of the Tags window under SPIVS.
Default Website Indicator Images are set at ‘New’, ‘Sale’, ‘Save’, ‘Self Assembly’ and ‘Special Offer’.
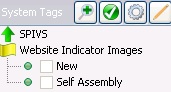
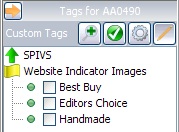
To apply a Website Indicator Image to an article, select the ‘Allow Editing’ button.
![]()
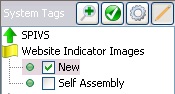
The tick boxes will appear highlighted to allow them to be selected.
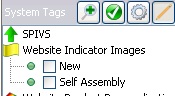
Tick the Website Indicator Image that applies to the selected article.
[su_divider]
Creating Custom Website Indicator Images
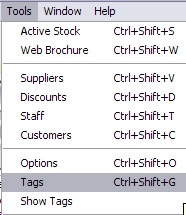
From the Back Office, go to ‘Tools’, Tags.
Ensure that the ‘Show Tags’ option is not ticked.

The Tags window will appear. Click on the ‘New’ icon.
![]()
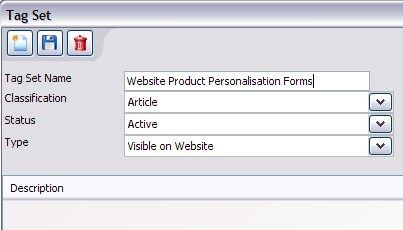
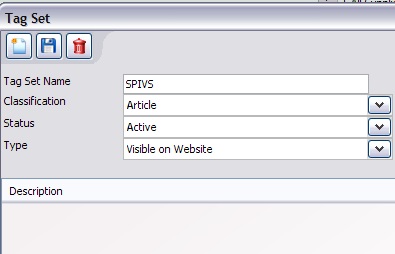
Enter in the Tag Set Name exactly as it appears in the System Tags window.
Set the Classification to ‘Article’.
Set the Status to ‘Active’.
Set the Type as ‘Visible on Website’.
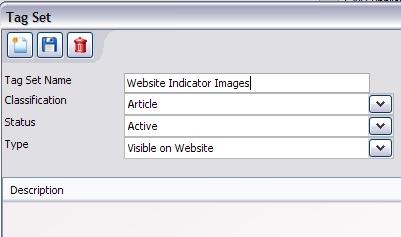
Select the ‘Save’ icon to save this new Tag Set.
![]()
Select the ‘New’ icon again to add Tags to the Tag Set.
![]()
The Tag window will appear. Enter the first tag in the field labelled ‘Tag’ (i.e. handmade or bestseller). Avoid adding spaces and using capital letters in Tag names for indicator images. The Tag name must exactly match the name of the indicator image file you are uploading.
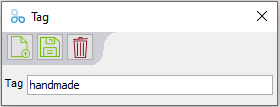
Select the ‘Save’ icon.
![]()
Continue entering all required Tag Names.
This will create a list of all tags in the Tag Set Window.
When all Tags have been created, click on the red cross in the top right hand corner of the Tag Window, Tag Set Window and Tag Sets window to return to the Back Office.
![]()
To create the icons to lay over the articles on your website, you need to create a both a .png image and a .svg image. The image file names must exactly match the name of the Tag for the indicator image e.g. handmade.svg and handmade.png or bestseller.svg and bestseller.png .
Please note that a .png cannot be converted to a .svg or vice versa as these are completely different file-types that are created very differently.
The size of this image should be no larger than 85 x 85 pixels.
![]()
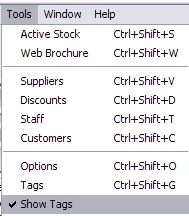
Go to go to ‘Tools’, Tags.
Ensure that the ‘Show Tags’ option is ticked. This will display the Tags window to the right of the screen.
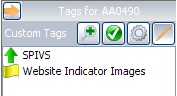
The new custom Website Indicator Images Tag Set will now appear, to expand this to view the custom tags added to the set, click on it once.
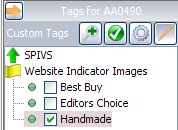
To apply the Website Indicator Image to an article, select the ‘Allow Editing’ button.
![]()
The tick boxes will appear highlighted to allow them to be selected.
Tick the Website Indicator Images that apply to the selected article.
To ensure the Website Indicator Images appear on your website, an upload from the web brochure is required.
For information on how to upload the image up to your website please see the New Website Manager helpsheet.
[su_divider]
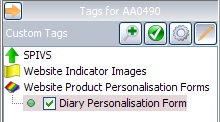
Product Personalisation Forms
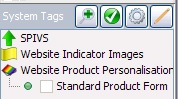
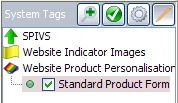
Product Personalisation Forms are found in the System Tags area of the Tags window.
A default Product Personalisation Form is set as ‘Standard Product Form’.
To apply the Product Personalisation Forms to an article, select the ‘Allow Editing’ button.
![]()
The tick boxes will appear highlighted to allow them to be selected.
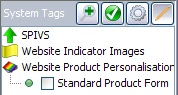
Tick the Product Personalisation Form that applies to the selected article.
[su_divider]
Creating custom product personalisation forms.
From the Back Office, go to ‘Tools’, Tags.
Ensure that the ‘Show Tags’ option is not ticked.
The Tags window will appear. Click on the ‘New’ icon.
![]()
Enter in the Tag Set Name exactly as it appears in the System Tags window.
Set the Classification to ‘Article’.
Set the Status to ‘Active’.
Set the Type as ‘Visible on Website’.
Select the ‘Save’ icon to save this new Tag Set.
![]()
Select the ‘New’ icon again to add Tags to the Tag Set.
![]()
The Tag window will appear. Enter the first tag in the field labelled ‘Tag’. (i.e. Diary Personalisation Form)
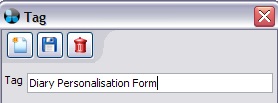
Select the ‘Save’ icon.
![]()
Continue entering all required Tag Names.
This will create a list of all tags in the Tag Set Window.
When all Tags have been created, click on the red cross in the top right hand corner of the Tag Window, Tag Set Window and Tag Sets window to return to the Back Office.
![]()
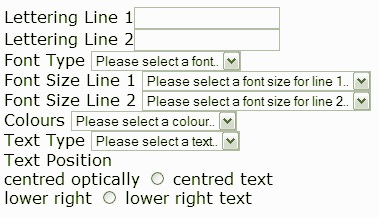
Create a customised personalisation form in html.
Html tags that are used are;
Pricing can be set using a hidden input element named IRFORMATTRIB_PRICE and setting the appropriate monetary value.
Pricing policy can be set using a hidden input element named IRFORMATTRIB_PRICE_UNIT.
Valid values are LETTER, WORD or FORM.
Intelligent Retail can provide a template html file as starting point for a new personalisation form.
The customised personalisation form needs to be saved at the following path.
The form MUST be named exactly the same as you named your Tag.
C:IR ConnectLivewebwww-yourURL-co-uk-ROOTforms
Go to go to ‘Tools’, Tags.
Ensure that the ‘Show Tags’ option is ticked. This will display the Tags window to the right of the screen.

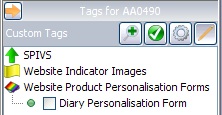
The new custom Product Personalisation Forms Tag Set will now appear, to expand this to view the custom tags added to the set, click on it once.
Select the article the Product Personalisation Forms is to be applied to then, select the ‘Allow Editing’ button.
![]()
The tick boxes will appear highlighted to allow them to be selected.
Tick the Product Personalisation Form that applies to the selected article.
To ensure the Product Personalisation Form appears on your website an upload from the web brochure is required.
[su_divider]
SPIVS (Sales performance incentives);
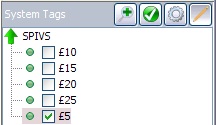
SPIVS are found in the System Tags area of the Tags window.
![]()
Default SPIVS are set at £5, £10, £15, £20 and £25.
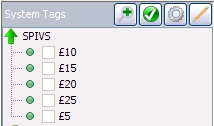
To apply SPIVS to an article, select the ‘Allow Editing’ button.
![]()
The tick boxes will appear highlighted to allow them to be selected.

Tick the SPIVS that apply to the selected article.
[su_divider]
Creating Custom SPIVS (Sales performance incentives);
From the Back Office, go to ‘Tools’, Tags.
Ensure that the ‘Show Tags’ option is not ticked.

The Tags window will appear. Click on the ‘New’ icon.
![]()
Enter in the Tag Set Name exactly as it appears in the System Tags window.
Set the Classification to ‘Article’.
Set the Status to ‘Active’.
Set the Type as ‘Visible on Website’.
Select the ‘Save’ icon to save the new Tag Set.
![]()
Select the ‘New’ icon to add Tags to the Tag Set.
![]()
The Tag window will appear. Enter the first tag in the field labelled ‘Tag’ (i.e. £7.50).
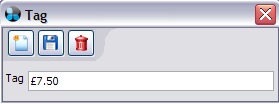
Select the ‘Save’ icon.
![]()
Continue entering all required Tag Names.
This will create a list of all tags in the Tag Set Window.
When all Tags have been created, click on the red cross in the top right hand corner of the Tag Window, Tag Set Window and Tag Sets window to return to the Back Office.
![]()
Go to go to ‘Tools’, Tags.
Ensure that the ‘Show Tags’ option is ticked. This will display the Tags window to the right of the screen.

The new custom SPIVS Tag Set will now appear, to expand this to view the custom tags added to the set, click on it once.
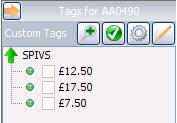
To apply SPIVS to an article, select the ‘Allow Editing’ button.
![]()
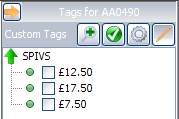
The tick boxes will appear highlighted to allow them to be selected.
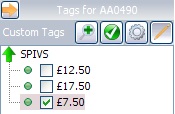
Tick the SPIVS that apply to the selected article.
[su_divider]