
High quality, clear and consistent images are a very important part of a successful website. Your Connect product makes it easy to keep images a consistent size whilst keeping quality at a maximum.
Connect includes an automatic image resizing system similar to that used in professional graphics packages. This whole system works in a way that is designed to optimise performance for customers using your website.
There are a few hints and tips to help you make the most of the facilities in Connect. There are two main areas in the Connect back office for customising your image settings.
[su_divider]
Storing Stock Images in the Connect Till & Back Office
When you add an image into Connect it resizes it to your customised settings and creates a copy in the Connect database. Here are the 3 types of image.
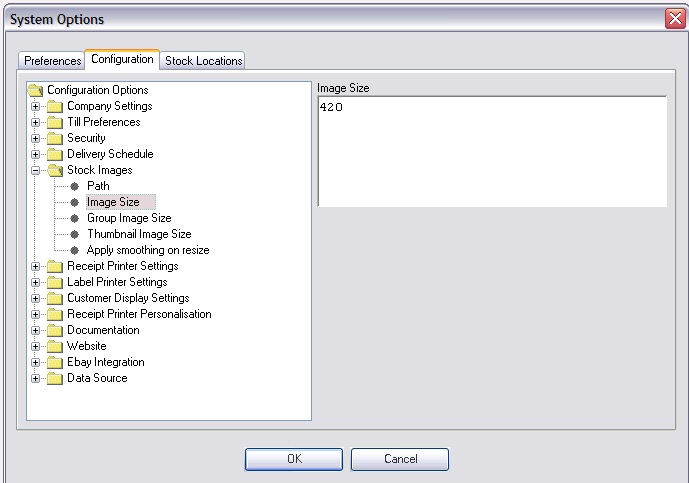
These settings are adjusted by selecting: Connect Back Office, Tools/Configure/Configuration, then:
[su_divider]
Stock Images Image Size
This sets the size of the image stored in Connect and will be the size of the maximum image available, i.e. the zoomed in image in your website.
So, the larger you have this setting, the larger the zoomed-in image will appear on your website.
The recommended size for general purpose use is: 1000
If you would like particularly large zoomed in files for example fashion and jewellery you may like to increase this to 1500 pixels.
Important Note: Images are the largest contributor to hosting usage, so if you set this image size to be very large your hosting costs can also be a lot higher.
[su_divider]
Resizing Images
Resizing Images Unnecessarily
Whenever an image is resized it loses some quality. Therefore Connect will not resize pictures unless it has to. If you have to do any picture editing then it is advisable to set the size of your image to the same size as Connect will expect it (the setting you have above – eg. 1000 pixels). This is not vital, it just minimises the amount of times the picture is saved and resized and maintains better quality.
[su_divider]
Image Smoothing
Connect includes an option to automatically apply additional image smoothing (also known as anti-aliasing). This can improve image quality when they are resized particularly on the edges. It is recommended this is turned on.
To turn it on go to Connect Back Office, then Tools/Configure/Configuration/Stock Images/ Apply smoothing on resize/
Set it to Yes.
[su_divider]
Image File Types
Connect supports jpg, png, and webp product images, but does not support transparent backgrounds.
[su_divider]
Using Multiple Images
In the Web Brochure you can add additional images to display an item nicely on the website. Once the item is in the Web Brochure, right hand click on the item name and select “Add Image” (as below).
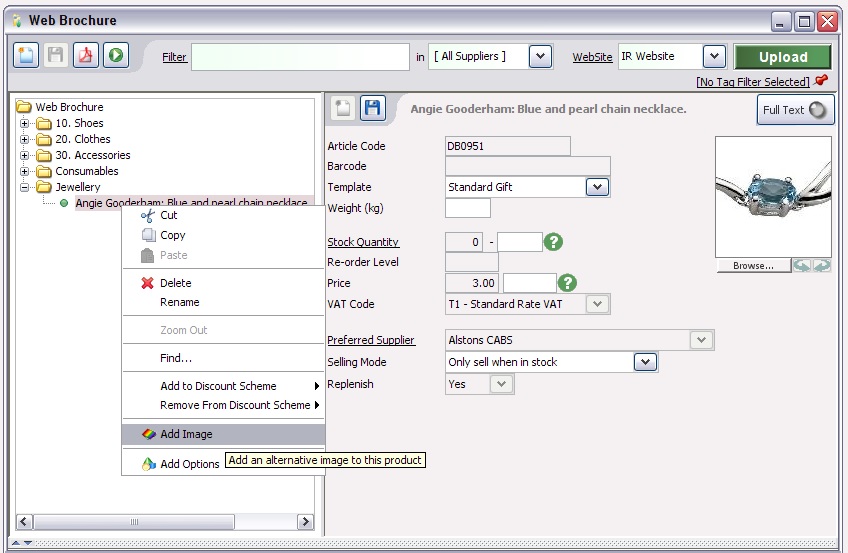
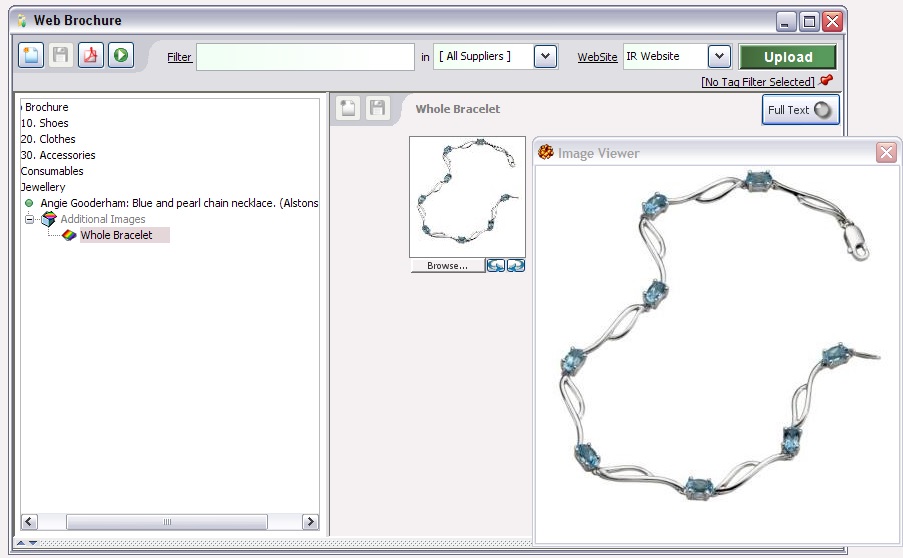
You can now add more images of the item. Each additional image can have its own text with it, just press the “Full Text” button so that you can describe the additional image, for example; “This beautiful bracelet is 6 inches long and has a lobster clasp”.
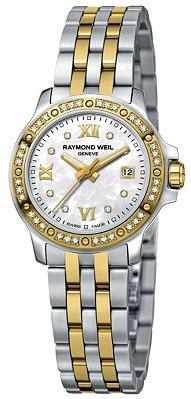
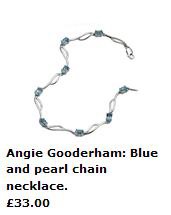
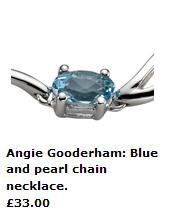
Hints and Tips for Displaying Fine Items such as Jewellery
Sometimes a thumbnail image of a complete item does not look too good if the item is delicate and there is a lot of white space. For the person browsing on your website it can be hard to quickly get a feel for the product, see image on left below. An alternative approach is to use a close up of the item for the main image (as in the example on the right), then use the whole bracelet as an additional image in Connect.
Additional Image
Main Image
[su_divider]