
Creating Category Introduction Banners
Category introduction banners appear at the top of your website’s category page and serve two main purposes.
Firstly, they provide a means to give additional information to your customers about brands and products in that category. For example, a banner may draw attention to your new range of Bugaboo Strollers in your Pushchair category. Alternatively, it may provide more information about product promotions you may be running such as discounted items with that category. The category introduction banner is an HTML page, which is inserted into the web page. It can contain any HTML that you would expect in a normal HTML page, this could include text, images, links, scrolling text and even (if feeling adventurous) Adobe Flash and Video content.
The second main use of Category Introduction Banners is in Search Engine Optimisation (SEO). Adding banners to your categories can greatly increase your chances of gaining higher results rankings in search engines. See the tips below on how to make your banners more attractive to search engines, especially Google.
Some Basic SEO Tips
If possible put the brand name of the production as part of the category name. For example rather than having a category called ‘Pushchairs’ with all your Pushchairs inside, split up your products by brand by creating sub categories within your main pushchair category.
Include the brand name or key phrase in large font at the top of the banner, this can be easily done by adding some simple HTML. For example ‘<h1>Bugaboo Pushchairs</h1>’, minus the quotes.
Make your important keywords and brand names bold. For example ‘<b>Bugaboo Pushchairs</b>’, minus the quotes. Your import keywords could be the words or phrases that your customers will use in a search engine in order to find your product. However do not flood your banners with keywords or all the same keyword. This will be counter-productive. Instead keep it subtle, include your important phrases making sure the banner is still readable to your customers. Try to add around 150-200 words to your banners.
Add Logos of your brand(s) and make sure the Alt attributes on your images include the brand name, read more about Alt attributes here http://en.wikipedia.org/wiki/Alt_attribute
Add links to your brand names so that when they are clicked will take you to a relevant part of the website will also improve the page SEO qualities.
You may have an HTML banner already created for you by Intelligent Retail, if not you will need to build a simple HTML page adding the content (text and images) you require. Basic HTML knowledge is required. If you are not sure about doing this, Intelligent Retail can design a banner for you, a small fee applies. This can be used on your website and you can then copy and edit it to create banners for your other categories.
Selecting where a category introduction banner will appear
Navigate to the website and then to the page you wish to add the banner to.
Note the URL at the top of the Web Browser. The page name follows. In this example it is ‘kitchen-gadgets’
[su_divider]
Creating and Naming a Category Introduction Banner
Login to the Website Manager via your website account page.
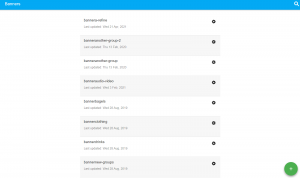
In the ‘Banners’ tab click in the bottom right hand corner, the green circle with a plus inside, to add a new banner.
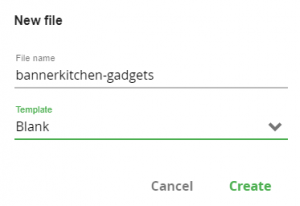
When naming the banner start with the word “banner” followed by the page name, for our example it would be “bannerkitchen-gadgets”.
Enter in the text and images you wish to appear in the category introduction banner.
For more information and a guide to using the Content Editor, please see our help-sheet Using the Content Editor.
Saving a category introduction banner
To save the banner, click on the save icon in the top right.
![]()
The Category Introduction Banner will now appear on the specified page.
[su_divider]