
This helpsheet will guide you through adding your logo to your receipts and gift vouchers when using an Epson USB receipt printer.
Personalisation of Receipts
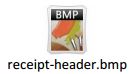
Create and save your company logo as ‘receipt-header.bmp’.
The file type should be monochrome bitmap.
This image should be set to 492 x 242 pixels.
Using Windows Explorer, navigate to C:/IRConnect/Live/images/print and save your logo.
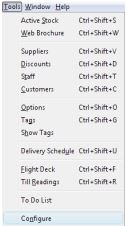
Start Connect. Open the back office, select the ‘Tools’ menu then ‘Configure’.
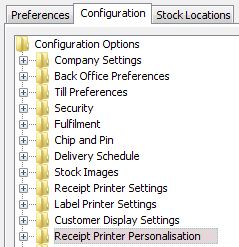
The ‘System Options’ window will open. Select the ‘Configuration’ tab then open the ‘Receipt Printer Personalisation’ folder.
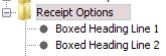
Open the ‘Receipt Options’ folder and remove any text from both the ‘Boxed Heading Line 1’ options and the ‘Boxed Heading Line 2’ options.
Click ‘OK’
Shut down and restart Connect. You are now ready to print.
[su_divider]
Personalisation of Gift Vouchers
Save your gift voucher logo as ‘gift-voucher-header.bmp’.
The file type should be monochrome bitmap.
This image should be set to 492 x 242 pixels.
Using Windows Explorer navigate to C:/IRConnect/Live/images/print and save your gift voucher logo.
[su_divider]