
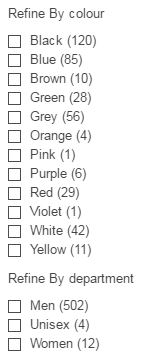
By using tags, you can create a ‘Refine By Menu’ on your website to better help your customers browse your site. An example would be to Refine By Colours or Gender.
Creating Tags you wish to Refine By
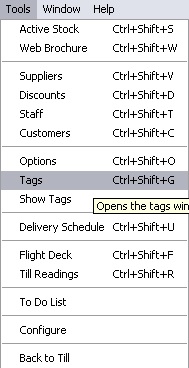
In Back Office, click on “Tools” in the windows menu bar and choose “Tags”.
The Tag Sets window will appear. Click on the “New” Icon
![]()
The Tag Set window will appear.

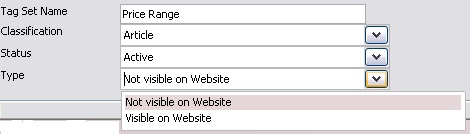
Enter a name for your Tag Set in the field labelled “Tag Set Name”. i.e. Colour
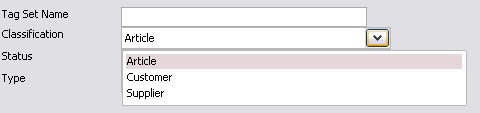
Click on the down arrow to choose the type of tag you want to create. For the Refine By you will want to chose ‘Article’.
Activate the tag. Your tags will normally be active, however if you wish to make the tag inactive for a while you can do that.

You will want to make the tag appear on your website, from the dropdown in the “Type” section select ‘Visible on Website’.
‘Save’ tag set
![]()
Now create your tags. Click on the New Icon
![]()
The Tag window will appear. Enter the first tag in the field labelled “Tag”. (i.e. Blue)
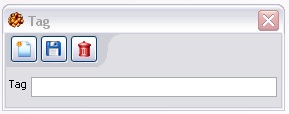
Click on the “Save” Icon
![]()
Continue entering all required Tag Names. This will create a list of all tags in the Tag Set Window.
When all Tags have been created, click on the red cross in the top right hand corner of the Tag Window, Tag Set Window and Tag Sets window to return to the Back Office.
![]()
Now close and open Connect to complete the creation of your new tags. Close and restart Connect Software.
[su_divider]
View Your Tags
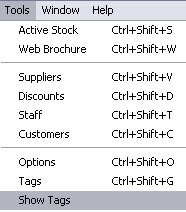
Click on “Tools” in the Windows menu bar and choose “Show Tags” within the Back Office of the Connect Platform.

The Tags Window will appear on the right hand side of the Back Office window.
[su_divider]
Apply Your Tags
Ensure that you have set Connect to Show Tags.
Click on the Channel Centre and Select your Web Shop.

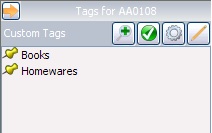
Highlight an Article to which you wish to apply a Tag.
![]()
The Tags window title will change to show the Article Code.
The Tags window will show all available Tags that can be applied.

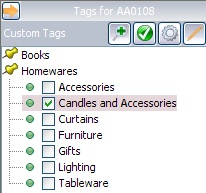
To tick the boxes next to the tags, you need to select the “Edit” icon. This will allow you to tick and un-tick tags for each article, supplier or customer.
![]()
Click on the checkboxes next to the available Tags which you wish to apply.
[su_divider]
Sending the Tags to your Website to create a Refine By Menu
Now you have created all your tag sets with all their relevant tags, you have tagged all of the products you wish to show with these tags, you are now ready to send this to your website to create your Refine By Menu.
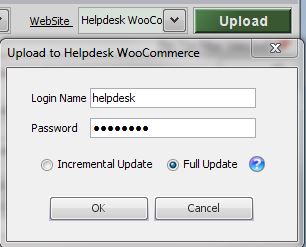
From the Back Office click on the Channel Centre.
Select your Web Shop and then click the green ‘Upload’ button. Select ‘Full Update’ from the ‘Upload Window’.
[su_divider]