
Creating a brand within connect
From the Back Office click on ‘Tools’ and then ‘Configure’.
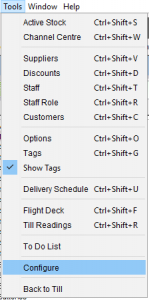
Select the ‘Brands’ folder.
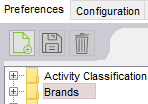
Click on the ‘New’ icon.
![]()
Name the brand, hit ‘Enter’ and then ‘Save’.
Do this for all brands.
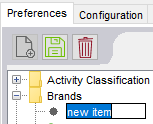
Click ‘OK’ to close the window.
![]()
[su_divider]
Adding brands to new products in connect
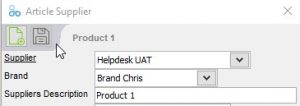
When creating a new article in Connect you can select the ‘brand’ from the drop down list in the supplier details window.
[su_divider]
Adding brands to existing products in connect
Locate the article in the back office and click ‘Preferred Supplier’ you can select the ‘brand’ from the drop down list in the supplier details window.
[su_divider]
Saving your brand logo
Save the brand logo to your local machine.
Name the logo so that the name is prefixed with ‘brand’. If the brand name has a space in it then the filename needs to use a – instead of a space.
The imagine file type can be jpg, gif or png. png would be our recommendation.
[su_divider]
Uploading the logo to your website
Login to your content editor / website management area and click on the ‘Images’ tab.
![]()
Click on the ‘Select files’ button on the top of the ‘Images’ tab.
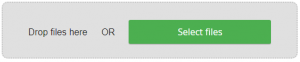
Click ‘Select files’ or drag and drop files into the body of the new window.
Files added will appear in the uploader. You can add as few or as many as you wish.
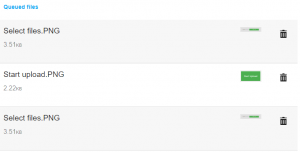
Click on the ‘Start Upload’ button to upload the image file to your website.
These files can be found in the images folder.

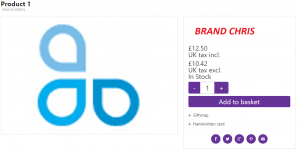
Your product pages will now display the brand logo.
[su_divider]