
In this article we will show you how to create Cartridges via Compound Products.
Creating the Option Set
In the Back Office, you will need to create a new option set by clicking on ‘Tools > Options’.
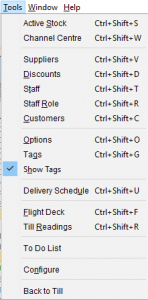
The ‘Option Set’ window will open and you will need to click on the ‘New’ icon.
![]()
Set your Option set name and click on the ‘Save’ icon.
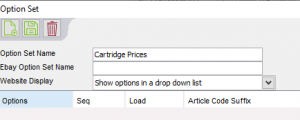
From the same window, you can now click on the ‘New’ icon to start creating your options.
![]()
The ‘Option’ window will now open, create your first price and enter its sequence, click ‘Save’ when done.
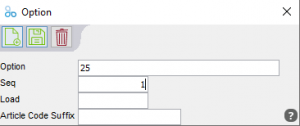
After hitting ‘Save’, the window will now clear and you can create the rest of your prices. Once finished, close this window and you will be taken back to the ‘Option Set’ window with all your Options now showing.
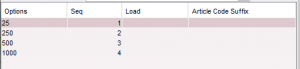
Press the ‘Save’ icon and you can now go ahead and close the ‘Options Set’ window.
[su_divider]
Creating the relevant Category Structure
In the Back Office, right click on the folder Active Stock and select ‘New > Group’.
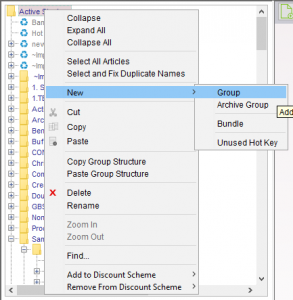
You will now need to name your folder, once named it will show in italics, finish by pressing the ‘Save’ button.
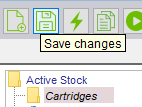
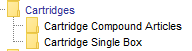
Now right click on your newly created folder and click on ‘New > Group’ to create a sub folder. Do this twice to create the following folders – ‘Cartridge Compound Articles’ and ‘Cartridge Single Box’. Make sure to press the ‘Save’ icon after so your text goes back to standard from italics.
[su_divider]
Creating the Cartridges
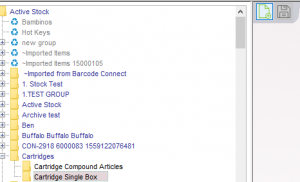
With the folder ‘Cartridge Single Box’ highlighted, click the ‘New’ icon on the right hand side.
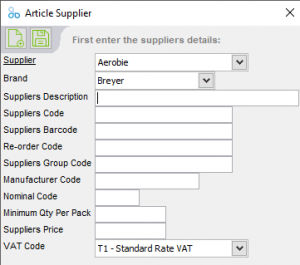
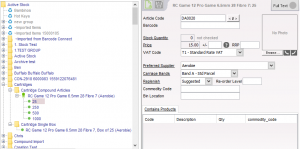
The ‘Article Supplier’ window will now open.
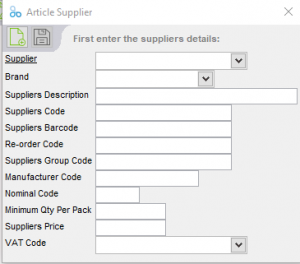
Now fill out your Supplier information and press the ‘Save’ icon when finished.
Your product will now show under the relevant folder in italics, click the ‘Save’ icon.

Now repeat the above process but this time, in the ‘Cartridge Compound Articles’, folder making sure to remove the Box quantity from the products title..
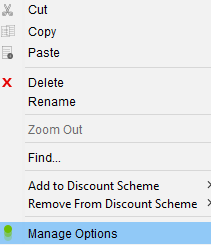
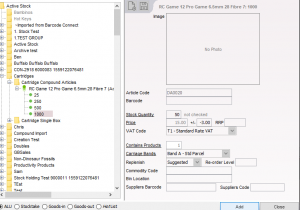
Now right click on the Compound Article and select ‘Manage Options’.
The ‘Manage Options’ window will now appear. Tick all options under ‘Cartridge Prices’ and click ‘OK’.
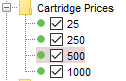
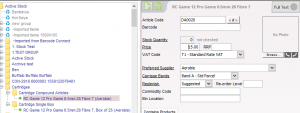
The product will now show in the Stock Tree with it’s Options. You can now make your price adjustments by clicking on each of the options and using the +/- field. Make sure to press the ‘Save’ icon to save your changes.
Now you will need to add the product(s) to the Compound Product. To do this, make sure that ‘ALU’ is selected at the bottom of the ‘Stock’ window.
Select your options that were created above and on the right hand side, click ‘Contains Products’.
The ‘Report Mode’ window will now open, tick your Single Box and click Apply.
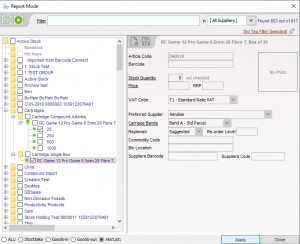
You should now see that when on your product that under ‘Contains Products’, your single box is showing.

Repeat these steps for any more products you need to create.
[su_divider]
Adding stock to the Cartridges
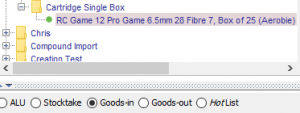
Select the single box cartridges and select either ‘Stocktake’ or ‘Goods-In’.
Now enter your stock and ‘Save’ your changes.
![]()
[su_divider]
Selling Cartridges at the Till
Select ‘ALU’.

Select your Cartridge with the relevant price and select ‘Add.
The product will now be added to the transaction. Double click on ‘Items’ to change the quantity of boxes being sold.
![]()
Add any further products that are needed for the transaction.
Once all items are added, select your payment method to complete the transaction.

[su_divider]