
This is a guide to exporting your products from the back office and then re-importing them with new or updated information.
Contents;
- Exporting the Products
- Re-Importing the Products
| Step 1 – Exporting the Products | ||
| 1 | Before you change any details, you’ll first need to export your current products. To start with filter to the products you wish in the active stock tree in the back office to change/update. You can do this using any of the filtering methods such as the supplier filter or the search.
Alternatively, if you want to export all products make sure no filters are currently on. |
|
| 2 | Now you’ve filtered to the relevant products (or all products) you’ll need to get to the report submissions window. To do this click ‘File’ and ‘Print Report’ or press ctrl + r whilst the stock tree is open and selected.
Alternatively, you can select certain products or categories by highlighting them (hold ctrl and click to highlight multiple. |
 |
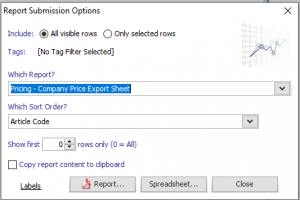
| 3 | Now you’re in the report submissions window you’ll need to select the ‘Pricing – Company Export Sheet’.
Select all visible rows if you want to do everything or just what you have filtered. If you selected certain categories/products, then do only selected rows.
Click spreadsheet to export the list. |
 |
| Please note that if you haven’t had any import training or used importing via a Spreadsheet before that you may need some assistance on the next steps. If you do have any issues just give the helpdesk a ring on 0845 68 00 127. | ||
| Step 2 – Re-Importing the Products | ||
| 1 | Now you’ve got your list of products you’ll need to remove any blank or excess rows at the top.
Start by removing the first three rows, just delete these as they’re not needed and will cause the import to fail.
Then delete the row that includes the totals at the bottom (in the screenshot this is row 8).
|
 |
| 2 | Now delete the row between the headers and the products (row 2 in the screenshot). | |
| 3 | The next step is to delete any columns that you don’t wish to change to keep the import as simple as possible, the only row you will need to keep so that the import is an update import instead of a new product import is the first column which is ‘!us:vendor_article_id’. For example, if you wish to only update the price, I’d recommend deleting all the other rows apart from ‘!us:vendor_article_id’, ‘us:vendor_article_code’, ‘us:short_description’ and ‘us:price’.
The reason you keep the vendor article code and short description is, so you know which product you are changing. |
 |
| 4 | You can now fill out any changes. For example if I wanted to change the price of my product on the second line to £50 I’d just change the relevant field to 50 under ‘us:price’. | |
| 5 | If any of the columns you wish to update aren’t there. For example, suppliers code you can take this from the import template and just ad this into the end. In my screenshot I have added this to column E.
NOTE: If you don’t have the import template the helpdesk can supply you with any headers you need or the import template. |
|
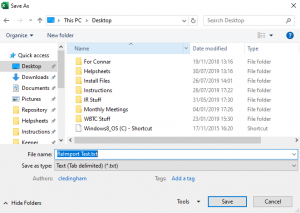
| 6 | Now your import is ready you’ll need to save the spreadsheet as a text tab delimited file. Most spreadsheet programs will offer you this format.
You can save this file in any location you like but make sure to take not of where you have saved this. |
 |
| 7 | Now you’re ready to import your new file. We recommend doing any import in the training till before you do it on your live so you can properly test that it does what you are aiming for. To do this your training till may need updated if the database doesn’t include the products you’re changing, the helpdesk can update this for you.
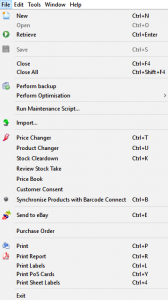
Once you’re happy with the import go onto your live back office and click ‘File’ then ‘Import’. |
 |
| 8 | You can just click ‘next’ through the next three windows. | 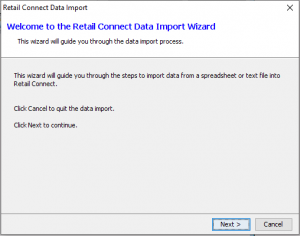 |
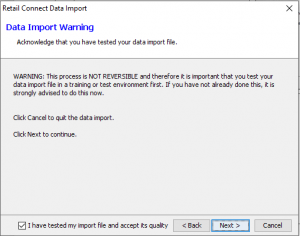
| 9 | If you’re happy with your imports quality and have tested it you will now need to tick the ‘I have tested my import file and accept its quality’ tickbox.
Click ‘next’. |
 |
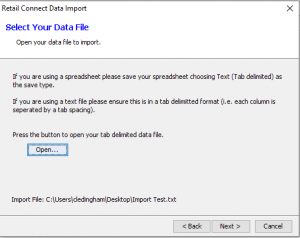
| 10 | Click ‘Open’ and browse to your import text tab delimited file. In this example the file is saved on the desktop and is called ‘Import Test’.
Once you have selected the correct file click ‘Next’. |
 |
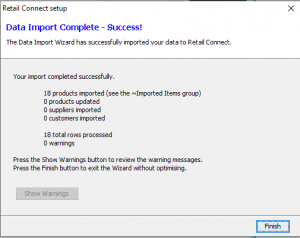
| 11 | You will now see a window like the one in the screenshot and have imported your file with the updates/changes.
At this point you can now just click ‘Finish’.
|
 |
| If you need any help or clarification during any of these steps feel free to give the helpdesk a call on 0845 68 00 127. | ||