
Article Codes are by default restricted to 6 characters; however article code suffixes can be extended to reflect the options available for the article.
Note; article codes longer than 13 characters are not recommended, as they will fail to print correctly on labels.
Setting Up Extended Article Codes
From the ‘Back Office’ go to ‘Tools’, then ‘Options’.

The ‘Options Window’ will open.
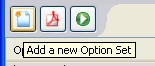
Click the ‘New’ icon to add a new ‘Option Set’.
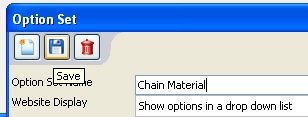
Enter the name into the ‘Option Save Name’ and click ‘Save’.
Click the ‘New’ icon to bring up a window about the individual Options within this Option Set.
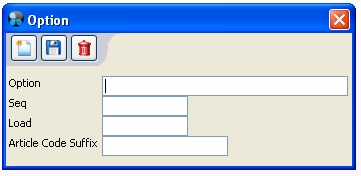
Enter the information into the fields, the text entered into the ‘Article Code Suffix’ box will become part of your Article’s extended code.

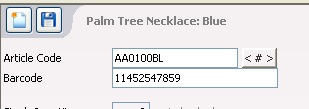
For example, for this article the article code is 6 characters long, the ‘BL’ is the Article Code Suffix for the colour blue.
[su_divider]
Changing settings in the Back Office to show extended article codes
In the ‘Back Office’ click ‘Tools’ and then ‘Configure’.
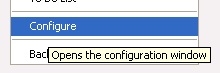
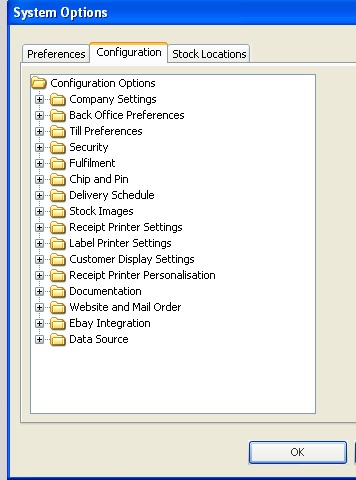
The ‘System Options’ window will appear.
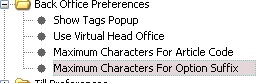
Select the ‘Configuration’ tab and then click the ‘Back Office Preferences’ folder.
Choose ‘Maximum Characters for Option Suffix’.
Change the number in the left-hand box to show the extended article suffix for articles with options.
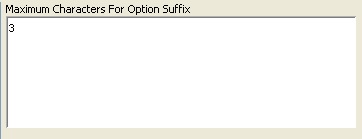
Click ‘OK’ to finish.
Now restart your Connect software to apply the changes.
[su_divider]