
Featured Products
This is a guide to adding featured products on your website.
Contents;
- Method 1 – Moving Products to the Correct Category (Quickest Method)
- Method 2 – Using Tags
| Method 1 – Moving the Products to the Correct Category | ||
| 1 |
This is by far the quickest and easiest method.
To Start with go to the back office on the system. Once on the back office click ‘Channel Centre’. |
 |
| 2 | Once on the channel centre, locate the product(s) you would like to display under ‘Featured Items’. |  |
| 3 | Click on the product(s). If you have multiple you can hold CTRL and click each one. |  |
| 4 | Right click on the highlighted products and click ‘Copy’. | 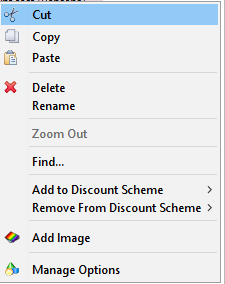 |
| 5 | Clear the search bar and right click on the folder titled ‘Web Shop’ (this should be the top folder on the tree). Then click ‘paste’. | 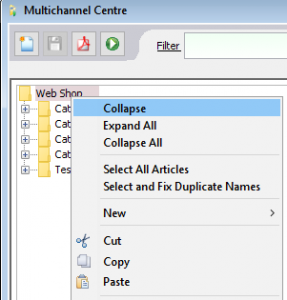 |
| 6 | Do a full upload to your website and this should now show the items in this ‘Web Shop’ category as featured items. | 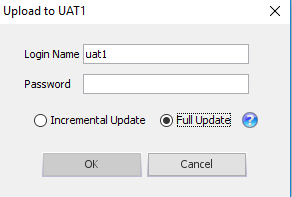 |
| Please note that if you have more than one website with us you will need to place these products under the category of the same name, below the ‘Web Shop’ folder. | ||
| Method 2 – Usings Tags | ||
| 1 | This is another method you can use to add ‘Featured items’ to your website.
The first thing you will need to do is create a tag set. To do this go to the back office and click ‘Tools’ at the top of the screen.
|
 |
| 2 | Click ‘Tags’. | 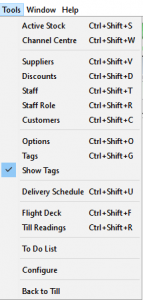 |
| 3 | To create a new tag set click the new page at the top of the ‘Tag Sets’ window. | 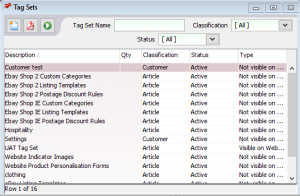 |
| 4 | Set the tag set name to be something relevant, for example ‘Featured Items’. Set the ‘Classification’ to ‘Article’, set the ‘Status’ to ‘Active’ and set the ‘Type’ to ‘Visible on Website’. |  |
| 5 | Click the save button at the top. |  |
| 6 | Click the new page button again whilst within the tag set. |  |
| 7 | Again call the tag something relevant and then just hit the save button at the top. | 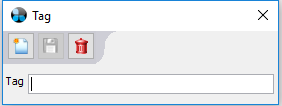 |
| 8 | Close all these windows now and open up the ‘Channel Centre’. | 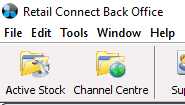 |
| 9 | Click on the product(s) you wish to be featured on the Channel Centre and you should see a ‘Tags for Web Shop’ window on the far right of the program. | 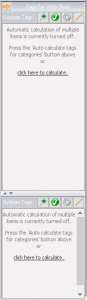 |
| 10 | Click the button that says ‘Click Here to Calculate’ and you’ll get a list of your tags. Click the Pencil at the top of this area. This is so that you can tick the tags you wish to add to the product.
|
 |
| 11 | Tick your newly created tags so that they are selected on your ‘Featured Items’. Click the pencil again to save these tags to the product. | 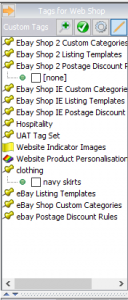 |
| 12 | Do a ‘Full Upload’ to the website. |  |
| 13 | Call the helpdesk on 0845 68 00 127 and we can then link this tagset to be the ‘Featured Products’ on the website. |  |
| Please note if you want to have more than one of these, for example a ‘New Items’ as well you can do this by repeating the same steps. | ||