
Mass price changing
Price changes can be performed using the filters within the Stock window to give greater flexibility to target the products which require more specific price changes.
Prices changes can be applied to:
● trade only prices, or
● retail only prices
Prices can be increased or decreased by the following methods:
● by value (£), or
● by mark-up, or
● by percentage.
[su_divider]
Where to find price changer
The Price Changer functionality is available from the Active Stock Window in the Back Office. Data can be selected for Price Changes at group level or at individual article level.
Click on the button labelled ‘Active Stock’ within the Back Office of Connect.
![]()
Click on the ‘Price Changer’ button.

The ‘Price Changer’ pop up window will appear.
[su_divider]
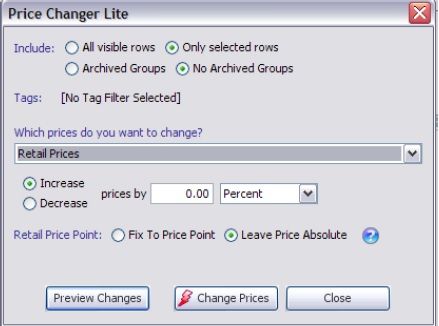
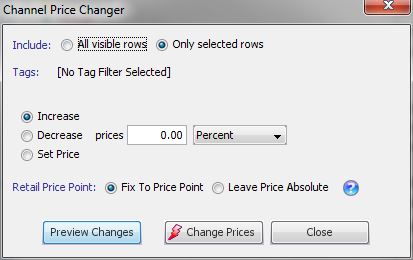
Price changer window sections
The Price Changer window has multiple sections which need to be completed to enable you to make changes to prices of articles.
Include
At the top of the window are four radio buttons:

1. All Visible Rows – all rows shown within the window
2. Only Selected Rows – row, group or article highlighted
3. Archived Groups – include Archived Groups
4. No Archived Groups – exclude Archived Groups
By default ‘Only selected rows’ and ‘No Archived Groups’ radio buttons are selected. By clicking on the radio button to the left of each label enables you to identify which data within the stock tree you wish to make price changes to.
Tags
This section will show any tags already selected as a filter within the Active Stock Window.
![]()
Which prices do you want to change?
Click on the down arrow to the right of this field and choose the required prices you want to change from the drop down list.

There are two options:
1. Retail Prices Only
2. Trade Prices Only
Increase or Decrease Prices
This section enables you chose whether to increase /decrease or set the type of price you have chosen.
By default the ‘Increase’ radio button is selected. By clicking on the radio button to the left of each label enables you choose ‘Increase’, ‘Decrease’ or ‘Set’.

If using Increase/Decrease, the next box enables you to enter a value by which to Increase/Decrease your chosen price type.

Connect enables you to Increase/Decrease prices in the following ways:
1. Percentage
2. Pounds and Pence
3. Mark-up
By default, Connect shows the increase/decrease by percentage. To change this default click on the button labelled ‘Percent’ and choose an alternative from the drop down list.
Set price allows you to enter the new value directly.
Retail Price Point
This section enables you choose whether to fix to a price point or whether to allow the increase to have varying values.
E.g. an increase by 5% gives an article a new value of £3.62. By fixing to a price point the value could be rounded up to £3.65 automatically or left at the new calculated value.
![]()
By default the ‘Fix to Price Point’ radio button is selected. By clicking on the radio button to the left of each label enables you choose either ‘Fix to Price Point’ or ‘Leave Price Absolute’.

Preview Changes
The button labelled ‘Preview Changes’ enables you to view the products which will be affected by the chosen price change options chosen in a pop up window titled ‘Review Price Changes’.
![]()
The preview window lists all the products along with the existing and new prices.
Change Prices
The button labelled ‘Change Prices’ activates the price change. The ‘Review Price Changes’ pop up window will appear showing all products affected by the price change along with new and existing prices.
![]()
A further pop up window will appear stating the number of product prices that are going to be changed and a reminder to preview the price changes.
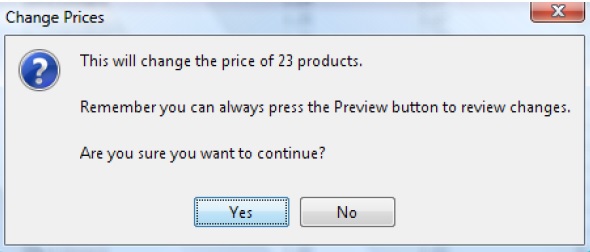
If you are unsure of the changes click on the button labelled ‘No’. The price change selection will be removed and will not be activated. Close the ‘Review Price Changes’ and ‘Price Changer’ windows by clicking on the red cross in the top right hand corner of each window.
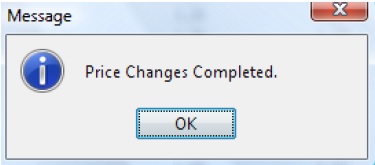
If you are confident of the changes you have chosen, click on the button labelled ‘Yes’. A Message Box will appear confirming that the Price Changes have been completed.
The button labelled ‘Close’ closes the Price Changer window. Any selected options will be removed.
Close
The button labelled ‘Close’ closes the Price Changer window. Any selected options will be removed.
![]()
[su_divider]
How to perform a price change
Identify the data on which to perform a price change.
See following section on selecting data.
Click on the Price Changer button
Select required options. See above section.
Preview Changes
Check to ensure that the right products are selected and the values chosen are correct.
Change Prices
Double check the number of products chosen and activate by clicking on the button labelled ‘Yes’.
Wait for completion message.
[su_divider]
How to select data for mass price changes
Click on the button labelled ‘Active Stock’ within the Back Office of Connect.
![]()
Choose from one of the following:
Selecting the Whole Stock Tree for Mass Price Changes
Click on the Active Stock label at the top of the stock tree. Mass Price Changes will be executed on all articles within the stock tree.
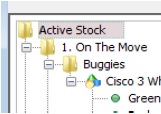
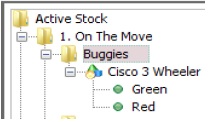
Selecting a Group or Sub Group for Mass Price Changes
Click on a particular Group or Sub Group, Mass Price Changes will be executed on all articles within the Group or Sub Group Highlighted in the Stock Tree. Ensure that you select the radio button labelled ‘Only Selected Rows’ when performing the Mass Price Change.
Selecting articles using filters for Mass Price Changes
Enter your chosen word in the filter field and press the enter key. The stock tree will now only show articles which have that word within their description.
![]()
Selecting articles using Hot Lists for Mass Price Changes
Select a Hot List. Mass Price Changes will be executed on all articles identified within the Hot List. Ensure that you select the radio button labelled ‘Only Selected Rows’ when performing the Mass Price Change.
Selecting articles using Tags for Mass Price Changes.
Click on the Tags Filter, and select the tags that you wish to report on.
![]()
Mass Price Changes will be executed on all articles applied to the chosen tag(s).
[su_divider]
Changing Prices on other channels e.g Amazon, eBay, Web
You are able to use your Price Changer for the Multichannels also. The process is the same as above without the option to change local store prices as this isn’t applicable for Multichannel.
Identify the data on which to perform a price change.
See following section on selecting data.
Click on the Price Changer button
Select required options. See above section.
Preview Changes
Check to ensure that the right products are selected and the values chosen are correct.
Change Prices
Double check the number of products chosen and activate by clicking on the button labelled ‘Yes’.
Wait for completion message.
You will now notice the override price has been changed.
![]()
[su_divider]