
This is a guide to adding named day delivery onto your website (this will only work for Intelligent Retail’s Responsive Websites).
Contents;
- How to set-up Named Day Delivery.
- How to remove/edit Named Day Delivery.
- How Named Day Delivery Displays on your Website and on Connect
| 1. How to Set-Up Named Day Delivery | ||
| 1 |
First login to your website on an account with full admin access and go to your account page. |
 |
| 2 | Click ‘Website Manager’ and login again. | 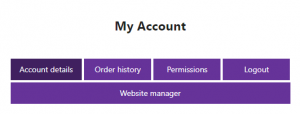 |
| 3 | This will log you into the content editor/website management area. Along the navigation bar on the left select ‘Carriage’. | 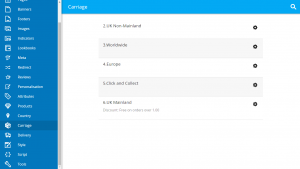 |
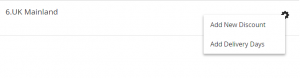
| 4 | Next to the carriage region you wish to add named day delivery on you should see a cog icon.
Click this and click ‘Add Delivery Days’. |
 |
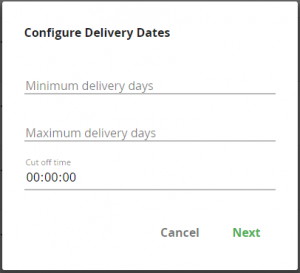
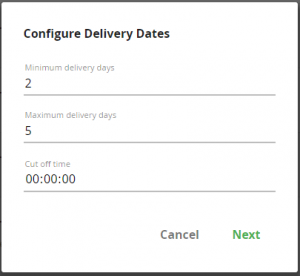
| 5 | At this point set the ‘Minimum Delivery Days’ to be the minimum amount of days you’ll deliver within. E.g. if the order was on Monday and they won’t receive until Wednesday at the latest then you’d set this field to be ‘2’.
Set the ‘Maximum Delivery Days’ to be the maximum amount of days you want people to be able to select. E.g. if this was set to ‘3’ and the order was on Monday then the customer could select only Thursday. Set the ‘Cut off time’ to the last time in the day where you can dispatch an order that day. Click Next. |
 |
| 6 | Select any days that you wish to offer named day delivery for by ticking the boxes next to the day and then click ‘Save’ to apply this to the website. | 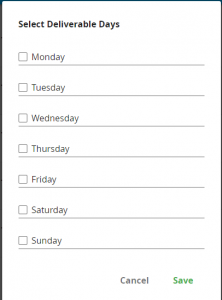 |
| 7 | If you wish to exclude any days from the Named Day Deliveries, then on the ‘Carriage’ tab of the content editor click the cog next to the carriage region you wish to edit.
Then click ‘Edit Excluded Delivery Dates’. |
 |
| 8 | Then input the date you wish to exclude from Named Day Deliveries and repeat this process until you have excluded any relevant days. | 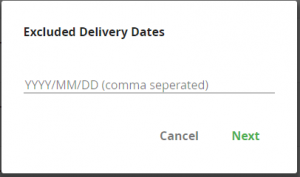 |
| 2. How to Remove or Edit Named Day Delivery | ||
| 1 | To remove or edit your named day delivery rules you just need to go back to the same ‘Carriage’ tab on your Content Editor/Website management area.
Click on the cog next to the carriage region you wish to edit/remove and click ‘Edit Delivery Days’ or ‘Remove Delivery Days’ |
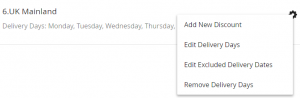 |
| 2 | If you click ‘Remove Delivery Days’, it’ll simply remove that rule/option from that carriage region.
If you select ‘Edit Delivery Days’, then it’ll open a window where you can go ahead and edit the rule/option. |
 |
| 3. How Named Day Delivery Displays on your Website and on Connect | ||
| 1 | Once the customer gets to the ‘Delivery’ section of your checkout process they will see the carriage region display as normal. So, for example in this case ‘UK Mainland’.
Once they then select ‘UK Mainland’ it’ll display the options the customer can select below this within a drop-down menu. |
 |
| 2 | Once the order has downloaded to the till it will display the day the customer has selected on the order on the delivery address tab like shown in the screenshot here. | 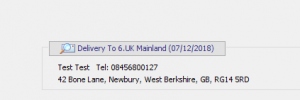 |