
The Product Changer is designed to help change certain details about products in bulk. Using this tool, you are able to change the following;
● Bin Location
● Brand
● Carriage Weight
● Group Code
● Max Level
● Min Level
● Min Qty Per Pack
● Nominal Code
● Preferred Supplier
● Re-Order Level
● Reorder Code
● Replenish
● Selling Mode
● Site Max Level
● Site Min Level
● VAT Code
[su_divider]
Where to find Product Changer
The Product Changer functionality is available from the Active Stock Window in the Back Office. Data can be selected for Product Changes at group level or at individual article level.
Click on the button labelled ‘Active Stock’ within the Back Office of Connect.
![]()
Click on ‘File’ then the ‘Product Changer’ button.
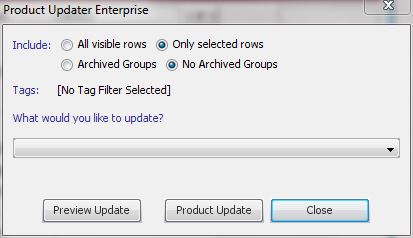
The ‘Product Changer’ pop up window will appear.
[su_divider]
Product Changer window sections
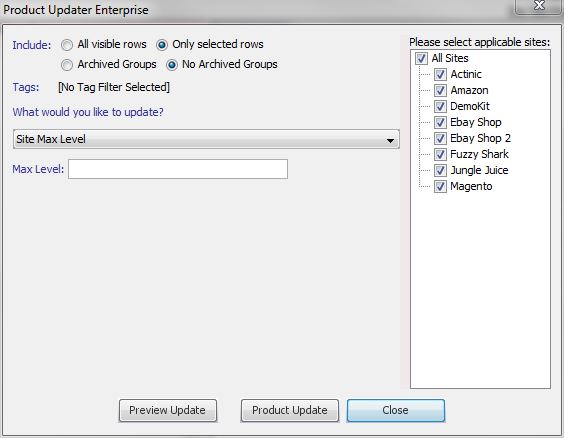
The Product Changer window has multiple sections which need to be completed to enable you to make changes to the articles.
At the top of the window are four radio buttons:

1. All Visible Rows – all rows shown within the window
2. Only Selected Rows – row, group or article highlighted
3. Archived Groups – include Archived Groups
4. No Archived Groups – exclude Archived Groups
By default ‘Only selected rows’ and ‘No Archived Groups’ radio buttons are selected. By clicking on the radio button to the left of each label enables you to identify which data within the stock tree you wish to make price changes to.
Tags
This section will show any tags already selected as a filter within the Active Stock Window.
![]()
What would you like to update?
Click on the down arrow to the right of this field and choose the required detail you would like to change from the drop down list.
![]()
Your options are;
● Bin Location
● Brand
● Carriage Weight
● Group Code
● Max Level
● Min Level
● Min Qty Per Pack
● Nominal Code
● Preferred Supplier
● Re-Order Level
● Reorder Code
● Replenish
● Selling Mode
● Site Max Level
● Site Min Level
● VAT Code
Preview Update
The button labelled ‘Preview Update’ enables you to view the products which will be affected by the product change chosen.
![]()
The preview window lists all the products along with the existing and new prices.
Product Update
The button labelled ‘Product Update’ activates the product change. The ‘Products to have information updated’ pop up window will appear showing all products affected by the price change along with new and existing changes.
![]()
A further pop up window will appear stating the number of product that are going to be changed and a reminder to preview the price changes.
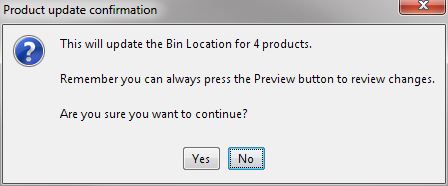
If you are unsure of the changes click on the button labelled ‘No’. The product change selection will be removed and will not be activated.
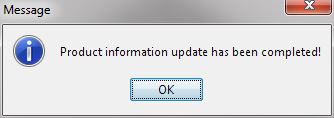
If you are confident of the changes you have chosen, click on the button labelled ‘Yes’. A Message Box will appear confirming that the Product Updates have been completed.
The button labelled ‘Close’ will close the Product Changer window. Any selected options will be removed.
![]()
[su_divider]
How to perform a Product Update
Identify the data on which to perform a product change.
See following section on selecting data.
Click on the Product Changer button
Select required options. See above section.
Preview Changes
Check to ensure that the right products are selected and the values chosen are correct.
Click Product Update
Double check the number of products chosen and activate by clicking on the button labelled ‘Yes’.
Wait for completion message.
[su_divider]
How to select data for mass price changes
Click on the button labelled ‘Active Stock’ within the Back Office of Connect.
![]()
Choose from one of the following:
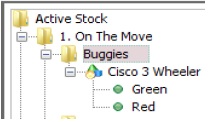
Selecting the Whole Stock Tree for Mass Product Changes
Click on the Active Stock label at the top of the stock tree. Mass Product Changes will be executed on all articles within the stock tree.
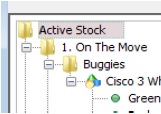
Selecting a Group or Sub Group for Mass Product Changes
Click on a particular Group or Sub Group, Mass Product Changes will be executed on all articles within the Group or Sub Group Highlighted in the Stock Tree. Ensure that you select the radio button labelled ‘Only Selected Rows’ when performing the Mass Product Changes.
Selecting articles using filters for Product Changer
Enter your chosen word in the filter field and press the enter key. The stock tree will now only show articles which have that word within their description.
![]()
Selecting articles using Hot Lists for Mass Product Changes
Select a Hot List. Mass Price Changes will be executed on all articles identified within the Hot List. Ensure that you select the radio button labelled ‘Only Selected Rows’ when performing the Mass Price Change.
Selecting articles using Tags for Mass Product Changes.
Click on the Tags Filter, and select the tags that you wish to report on.
![]()
Mass Product Changes will be executed on all articles applied to the chosen tag(s).
[su_divider]
Changing Min or Max based on Site Level
By selecting Site Min or Max from the drop down, you are able to adjust Min or Max levels across multiple sites.
[su_divider]