
This document describes how to create and attach Options to articles in the Stock Tree. Options enable articles to have distinct attributes. i.e. Colour, Size, Shape, Wood Type.
[su_divider]
Creating options
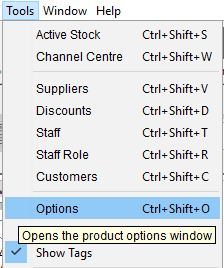
From the Back Office in Connect, click on Tools in the windows menu bar and choose Options from the drop down list.
The Option Set Window will appear. To create a new Option Set, click on the ‘New’ Icon.
![]()
A further Options Set window will appear. Enter a name for the Option Set you wish to create. i.e. Colours
There are recommended Option Set naming conventions. These should be adhered to when a product will have multiple levels of options set i.e. Colour and Size. The precedence of option sets are determined alphabetically i.e.
Which Option Set is displayed first e.g. Colour then Size or Size then Colour.
![]()
Recommended ‘Option Set’ Naming Convention:
Colours – Maxi Cosi
Colours – Mamas & Papas
Colours – Silver Cross
Sizes – Maxi Cosi
Sizes – Mamas & Papas
Sizes – Silver Cross
Click on the ‘Save’ Icon. This saves the Option Set Name.
![]()
Click on the ‘New’ Icon.
![]()
The Option Window will appear. Enter an option type i.e. Pink.
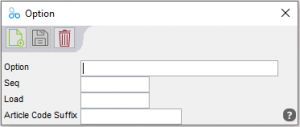
‘Seq’ and ‘Load’ can be left as blank fields.
‘Article Code Suffix’
If the article code suffix is blank the article code will be the same for the master product and all of its options. If the article code has an entry e.g. BL for blue, then this will be appended to the article code for that option. E.g. a product AA1004 that comes in blue will be AA1004BL.
![]()
Click on the Save Icon.
![]()
Continue to add option types for that Option Set by entering the Option and clicking on the Save Icon.
When you have entered all the option types you require, shut each of the Option windows using the red cross button in the top right hand corner of each window.
![]()
[su_divider]
Adding options to articles
Options can only be added to articles which exist on the Stock Tree. The description of this article should be generic i.e. excluding reference to the Option Sets you wish to add e.g. Colour, Size etc.
Adding one level of option (e.g. only colour)
Choose and highlight the article in the stock tree to which you wish to add options. I.e. Candle which is available in multiple colours.
![]()
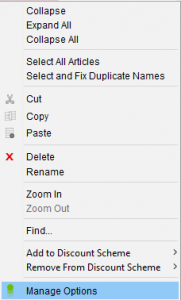
Right click on the article. Choose ‘Add Options’ from the drop down menu.
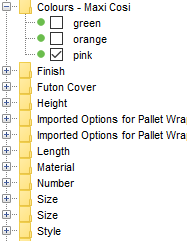
The Add Options Window will appear showing a list of the Option Sets created.
If multiple Option Sets have been created use the scroll bar to find the Option Set Name you wish to select from. Click in the checkboxes to the left of each Option you wish to add to the article.
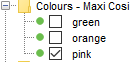
Click on the OK button.
![]()
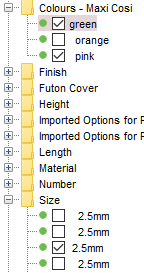
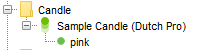
You will notice that the article now has the options that you selected.
[su_divider]
Adding multiple option levels (e.g colour and size)
Choose and highlight the article in the stock tree to which you wish to add options. ie. Candle which is available in multiple colours.
![]()
Right click on the article. Choose ‘Add Options’ from the drop down menu.
The ‘Add Options’ Window will appear showing a list of the Option Sets created.
If multiple Option Sets have been created use the scroll bar to find the Option Set Name you wish to select from.
1st Option Level (e.g. Colour) Click in the checkboxes to the left of each Option type you wish to add to the article.
Then, 2nd Option Level (e.g. Size) Click in the checkboxes to the left of each Option type you wish to add to the article.
Note: Do not add option types from other non applicable Option Sets. If the option type is not shown in your preferred Option Set you will need to close this window and create it the option type. See above.
Note: If you have only added one level of options by mistake and then wish to add a further level, it must be added at the master product level.
Click on the OK button.
![]()
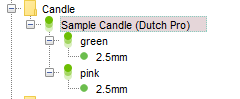
You will notice that the article now has the options that you selected.
[su_divider]