
You can use the Content Editor to edit content within your website. This content could consist of text, images or meta data. Each of these areas are explained in this help-sheet.
Note:
- It is important to take care when editing your pages as these are live web pages and errors can have bad consequences. Charges for remedial work to fix errors may be incurred.
- As a general guideline use the editor to simply change text, pictures and hyperlinks.
Accessing the Content Editor
Create an account on your website.
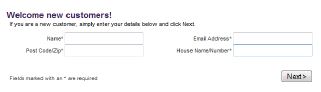
Wait for synchronisation to occur.
![]()
Locate the new account in the customer database from the back office.

Open the new record and change the website access to ‘Full Admin Access’.
Click ‘Save’.
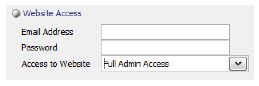
Wait for synchronisation to occur.
![]()
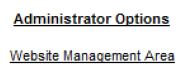
Login to the account via your webpage and click on ‘My Account’

Below Administrator Options, click on ‘Website Management Area’
[su_divider]
Page Editing
Before You Begin – Important Information
Activity relating to the self-editing of your website is outside of the scope of the standard Intelligent Retail helpdesk support service. If you are unsure about any change you are planning to make, it is recommended that the Intelligent Retail website design team are commissioned to do the change for you. To request a quotation for commissioned design changes to your website, please send details of the request to creativedesign@intelligentretail.co.uk

Using the ‘Page Editing’ tab you can make changes to style sheets, meta files and pages within your website.
Editing Style Sheets
To make a change to any of the style sheets click on the link associated with them.

Make changes in the style sheet editor and then click ‘Save’.
![]()
A confirmation message will be displayed when the page has been successfully saved.
![]()
[su_divider]
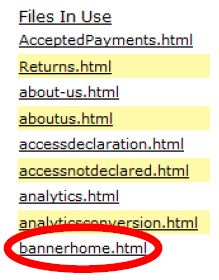
Editing Meta Files
To make a change to the meta files click on the link associated with them.
![]()
Make changes in the meta file Editor and then click ‘Save’.
![]()
A confirmation message will be displayed when the page has been successfully saved.
![]()
[su_divider]
Editing Pages within your Website
To make a change to any editable page within your website click on the link associated with them.
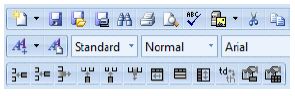
The page editor is used in a similar way to a word processing program. The buttons along the top represent the formatting tools.
Select ‘Edit’ to use a WYSIWYG editor
‘HTML’ to use pure code
‘Preview’ to view your changes
![]()
When you have finished editing your page click ‘Save’.
[su_divider]
File Uploading
Use this page to upload additional files, click the correct button depending on what type of file you are uploading.

Create a HTML file and save it on your local machine.
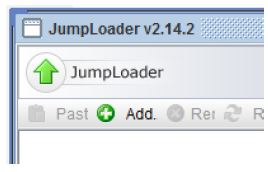
Click on the ‘Jumploader’ button beneath ‘Upload a html file’.

Click ‘Add’ or drag and drop files into the body of the new window.
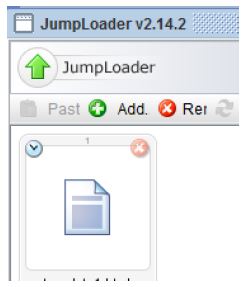
Files added will appear in the uploader. You can add as few or as many as you wish.
Click on the ‘Upload’ button to upload the html file to your website.

[su_divider]
Uploading an Image File
Create an image file in *.jpg *.jpeg *.gif or *.png format and save it on your local machine.
Click on the ‘Jumploader’ button beneath ‘Upload an image file’.

Click ‘Add’ or drag and drop files into the body of the new window.
Files added will appear in the uploader. You can add as few or as many as you wish.
Click on the ‘Upload’ button to upload the html file to your website.
[su_divider]
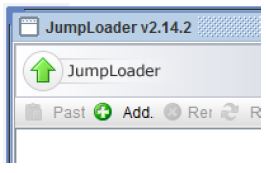
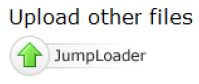
Uploading Other Files
Create a file in *.txt *.pdf or *.js format and save on your local machine.
Click on the ‘Jumploader’ button beneath ‘Upload other files’.
Click ‘Add’ or drag and drop files into the body of the new window.
Files added will appear in the uploader. You can add as few or as many as you wish.
Click on the ‘Upload’ button to upload the html file to your website.
[su_divider]
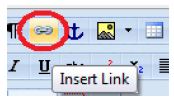
Creating hyperlinks using the WYSIWYG editor
Highlight the text or select the image you wish to add a link to.
Select the ‘Insert Link’ icon.
Add in the URL and click ‘OK’
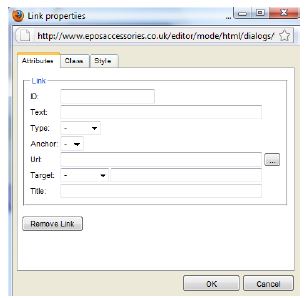
To remove the link highlight the text or select the image and click on the ‘Insert Link’ icon.
Click on ‘Remove Link’
![]()
[su_divider]
Replacing images using the WYSIWYG editor
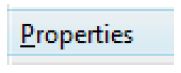
Locate the image on your website and right click on it to display a menu.
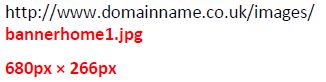
Click ‘Properties’.
Make a note of the image name and size.
Create a new image named and sized exactly the same as the image you wish to replace. Upload the image following the steps above.
[su_divider]
Adding images using the WYSIWYG editor
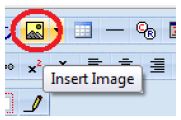
Place your cursor in the place on the page you wish to add an image into.
Click on the ‘Insert Image’ icon.
Open the ‘Images’ folder.
![]()
Select the image you wish to add then click ‘Open’.
![]()
[su_divider]
Removing images using the WYSIWYG editor
Select the image you wish to remove and hit ‘DELETE’ on your keyboard.
[su_divider]
Reloading your Website
When you have finished editing your website pages you may like to clear the cache. Click ‘Reload Website’ under the ‘Page Editing’ tab.
Note: Reloading Your Website (Clearing the Website Cache)
This button allows you to refresh the content on your website in order to make any page changes visible. Production websites typically utilise caching techniques to improve website performance. A side-effect of website caching is that changes you make may not be immediately viewable, instead the cached version showing.
Reloading your website will clear the cache by stopping then restarting your website. If you choose this option then always check the site is running afterwards and notify the support team if this is not the case.
Though this is unlikely, when changing content and reloading your website there is always an element of risk. Please make all of your changes then use this button as a final step to minimise its usage, as restarting will interrupt the smooth running of your website.

[su_divider]
Page Meta Policies
Use this page to define Meta Title, Key and Description values for each page within this website.
This page is intended for third-party search engine optimisation companies. Changing settings in this area without fully understanding the purpose could negatively affect your website search engine listings or worst case, cause unexpected downtime for your website. Actions performed within this page fall outside the scope of standard Intelligent Retail support service. Any remedial work will therefore incur an hourly charge.

Add/Edit Meta Policy
Enter text in the fields below the ‘Add/Edit Meta Policy’.

In the ‘page’ field, use the part of the relevant URL that you wish to edit, ending in .irc e.g. leather-handbags.irc silver-jewellery.irc ankle-boots.irc
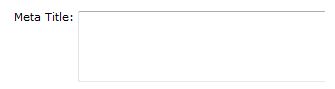
The ‘Meta Title’ is the text in the blue bar at the very top of your browser. For your website homepage, this will probably be the name of your store.
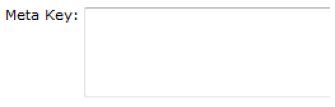
The ‘Meta Key’ is a combination of words and two/three word phrases which describe that page.
If you sell cakes, your homepage keywords could be ‘wedding cakes, corporate cakes, christening cakes, birthday cakes, novelty cakes’.
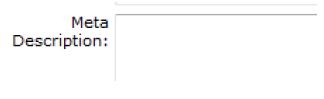
The ‘Meta Description’ should be treated like an advert for your website. Any text added in this field will often show up in the search engine results underneath the title of the result.
Leave the ‘Breadcrumb’ field empty
Click ‘Save Meta’

[su_divider]
Page Redirects
Use this page to redirect from one page to another. You can redirect from different domains or across the same domain.
This page is intended for third-party search engine optimisation companies. Changing settings in this area without fully understanding the purpose could negatively affect your website search engine listings or worst case, cause unexpected downtime for your website. Actions performed within this page fall outside the scope of standard Intelligent Retail support service. Any remedial work will therefore incur an hourly charge.
Use this page to redirect from one page to another. You can redirect from different domains or across the same domain.
Examples:
- To redirect from pages that no longer exist that were on the same domain, follow the example:
– oldURL: http://www.mydomain.co.uk/Items/gg-30734-02
– newURI: index.jsp?layout=1&limit=10&searchStr=Pink Stripey Fabric Cupcake Pin Cushion: GG 30734-02 - To redirect from an different domain, first forward that domain to your website domain and follow the example:
– oldURL: http://www.mydomain.co.uk/default.aspx?size=junior&rnd=ce97d78a-11cd-4f4f-ada7-c170d63e0d76
– newURI: index.jsp?layout=1&limit=10&searchStr=cricket equipment, cricket bats
Note: to edit an entry, click on the page name in the list to modify it.

Page Redirects
Enter text in the fields below the ‘Add/Edit a Page Redirect’.

Enter in the old URL and the new URI.
Click ‘Save Meta’.
[su_divider]