
This help sheet will guide you through how to create E-Gift Cards in Connect to be sold online.
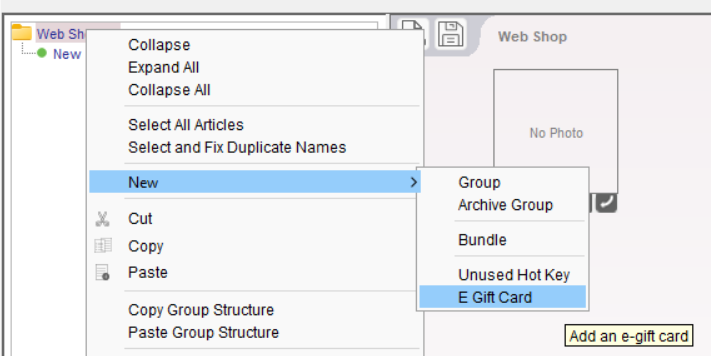
- To create the E-Gift Card in Connect, open your Web Shop, then right click the Web Shop folder at the top of your website category structure.
- Select New then E Gift Card
3. Once you have created the E Gift Card, you can change the name of the product and add an image and full text
4. You can then move to product to a category
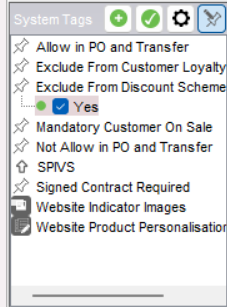
5. We would also recommend tagging the product to exclude it from discount schemes. This can be done by using the ‘Exclude from Discount Scheme’ tag set in the bottom right of the Back Office
6. Once you are happy with the changes please perform an incremental upload
7. Your product will appear on your website and give you customer the following options
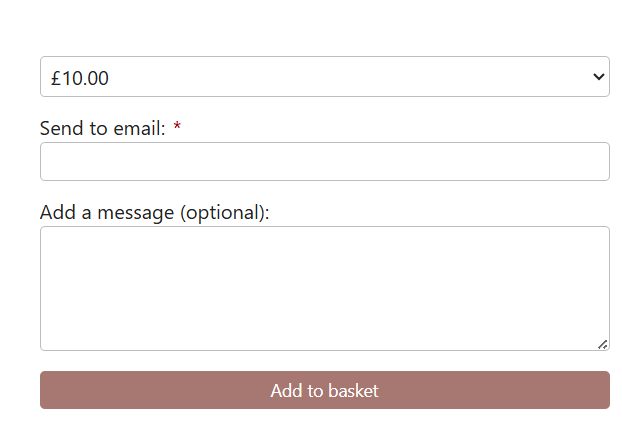
8. The first option is for the value of the product, there are pre selected amounts and an option for a custom amount
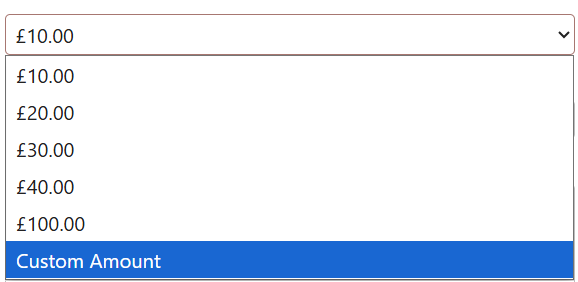
The pre selected amounts can be changed by our support team if needed
The Send Email To field will be the recipients email address, the email can be sent directly to the recipient or your customer can have the email sent to themselves to be forwarded at a later date.
The Add a Message field is will be added to the E Gift Card Email
9. The paid order will download as normal, if there is only a E Gift Card on the transaction the order can be dispatched as the customer would have already received their E Gift Card, you will also get a copy of the E Gift Card via email