Royal Mail Click & Drop Help Guide
- This is a guide to link Connect and Royal Mail (RM) Click & Drop. This integration should only be installed on one Connect license.
- Royal Mail require weight to be added to your articles. For help on setting weight in Connect please visit this link https://support.intelligentretail.com/setting-up-delivery-charges-by-weight/
| 1 | Register for RM Click & Drop | https://parcel.royalmail.com/ |
| 2
|
To begin, click the ‘Settings’ link within Click & Drop. | |
| 3 | The ‘Settings/ Overview’ page will open. Click anywhere within the ‘Integrations’ tile. | 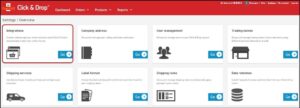 |
| 4 | If you have any, then your current integrations will be displayed. If you don’t then none will be displayed. Click the ‘Add a new integration’ button to begin connecting to Click & Drop Desktop. | 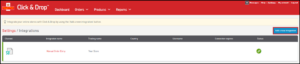 |
| 5 | From the list of available integrations, click ‘Click & Drop Desktop’. | 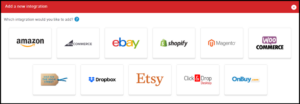 |
| 6 | A new window will appear. Please click the relevant download button for your operating system. | 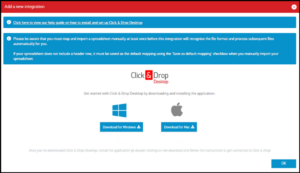 |
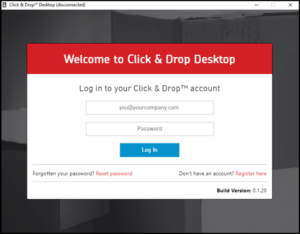
| 7 | Once the application has been downloaded, you will need to install it.
After you have installed the app, you will need to log in using your Click & Drop account details. |
 |
| 8 | The first time you log into Click & Drop Desktop, you will be redirected to the Settings > Integrations page within Click & Drop, where you can configure the settings for your integration.
Trading name: Select your trading name from the drop-down list. If you only have one trading name, it will be automatically entered. Integration name: Choose the name your integration will be displayed under within Click & Drop. Print labels automatically: Check this option if you wish for your labels to be printed automatically. For this functionality to work, your orders must have weight, shipping service, and package size details. Additionally, You must have Royal Mail Print Assist installed and switched on. Please note that labels can only be printed automatically for spreadsheets containing 50 rows or less (51 if including a header). Save a copy of labels to the ‘Watch’ folder: Check this option if you wish for copies of your labels to be saved into your ‘Watch’ folder. Please note that labels can only be saved to your watch folder for spreadsheets containing 50 rows or less (51 if including a header). Configure workstations: If you would like your labels to be sent to more than one printer, you will need to configure workstations. Please see this guide for more information: How to configure multiple workstations. Click the ‘Update’ button when you are ready. |
 |
| 9 | Open the Click & Drop application from your system tray or start menu. Once open, the ‘Home’ tab will be displayed. Click the ‘Settings’ tab to go to the settings page. | 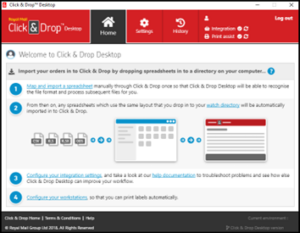 |
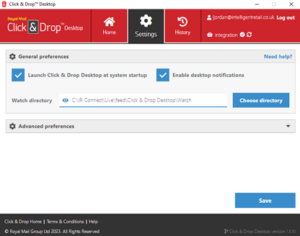
| 10 | General preferences: Launch Click & Drop at system startup: Leave this box checked if you wish for Click & Drop Desktop to load up every time you start or restart your computer.
Enable desktop notifications: leave this box checked if you wish for popup notifications to inform you when a file has been successfully imported. Watch directory: This is the folder that Click & Drop Desktop will use to import your orders. It is also referred to as your ‘Watch’ folder. Click the ‘Choose Directory’ button and change this directory to: C:\IR Connect\Live\feed\Click & Drop Desktop\Watch |
 |
| 11 | Advanced preferences:
Use polling: If your ‘Watch’ folder is on a shared network location, and not a local computer or device location, and you are encountering difficulties uploading your files, polling mode is an additional option available. This can be a suitable option for some older shared network drives. Please note that our recommendation is to use Click & Drop Desktop without polling mode enabled as there is a slight risk that some imports could be duplicated. |
|
| 12 | Once you have finished configuring your settings, Click the ‘Save’ button and then click ‘Home’ |  |
| 13 | From you Click & Drop application click on: ‘Map and import a spreadsheet manually through Click & Drop once so that Click & Drop Desktop will be able to recognise the file format and process subsequent files for you.’ | 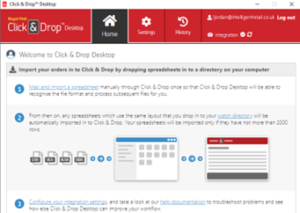 |
| 14 | This will open Click & Drop in your browser. | 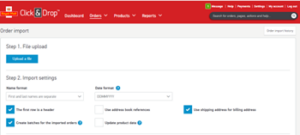 |
| 15 | Open another browser tab and navigate this link. Download and extract the zipped file to a location of your choice on your PC. | http://helpguide.intelligentretail.com/RMClickAndDropMappingTemplate.zip |
| 16 | Navigate back to you the Click & Drop tab on your browser. Click on ‘Upload a file’ | 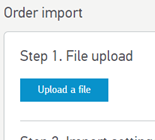 |
| 17 | Locate the ‘RMClickAndDropMappingTemplate’ file you downloaded and saved in part 15. Within this file you will find two csv files. To check which file you need, in Connect, go to the Back Office area of Connect and then ‘Tools>Configure>Configuration>Website and Mail Order>Carriage Mode (H=High Band Item Only,B=Band,W=Weight). If your setting is ‘W’ then you will need to use the file named ‘MappingTemplate.csv’. Any other setting and you will need to use the file named ‘Mapping_Template_NoWeight.csv’. Drag the relevant file onto the popup window and leave the column delimiter as ‘Comma’. Click ‘Upload file’ |  |
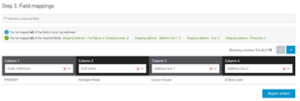
| 18 | In the import settings confirm the name format is set as ‘First and last names are combined’. Uncheck the box for ‘The first row is a header’, check the box for ‘Save as default mapping’ and leave ‘Use shipping address for billing address’ checked. | 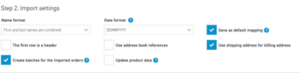 |
| 19 | Configure the field mapping as follows (Please note that if using the ‘No Weight’ template then column 10 will be ‘Phone’. Column 11 will be ‘Email’ etc.: Column 1 – Order referenceColumn 2 – Full name Column 3 – Address line 1 Column 4 – Address line 2 Column 5 – City Column 6 – County Column 7 – Postcode Column 8 – Country Column 9 – Special Instructions Column 10 – Weight Column 11 – Phone Column 12 – Email Column 13 – Total Column 14 – Identifier (SKU) Column 15 – Product Name
Click on ‘Import orders’ |
|
| 20 | Click on ‘see imported batches’ on the green bar that appears at the bottom of the screen | |
| 21 | Click on ‘Orders’ on the red menu bar at the top of your screen and you will see that the template order has imported into Click & Drop | 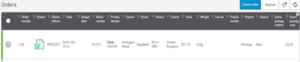 |
| 22 | Download the zip file containing the ‘RoyalMailClickAndDrop.xslt’ file. This zip contains two files; ‘RoyalMailClickAndDrop_weight.xslt’ and ‘RoyalMailClickAndDrop_NoWeight.xslt’. If your Connect setting was ‘W’ in point 15 then you will need to use the file named ‘RoyalMailClickAndDrop_weight.xslt’. Any other setting and you will need to use the file named ‘RoyalMailClickAndDrop_NoWeight.xslt’. Extract the file, rename it to ‘RoyalMailClickAndDrop.xslt’ and save it to ‘C:\IR Connect\Live\feed\Click & Drop Desktop\Watch\Template’ | http://helpguide.intelligentretail.com/RoyalMailClickAndDrop.zip |
| 23 | In Connect, from the back office go to ‘Tools>Configure>Configuration’ and expand the Royal Mail configuration folder | 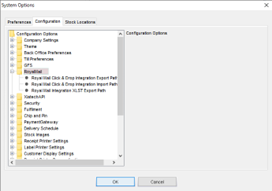 |
| 24 | In the setting ‘Royal Mail Click & Drop Integration Export Path’. Enter the following file path: C:\IR Connect\Live\feed\Click & Drop Desktop\Watch |  |
| 25 | In setting ‘Royal Mail Click & Drop Integration Import Path’. Enter the following file path: C:\IR Connect\Live\feed\Click & Drop Desktop\Watch | 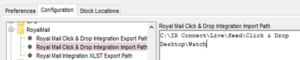 |
| 26 | In setting ‘Royal Mail Integration XLST Export Path’. Enter the following file path: C:\IR Connect\Live\feed\Click & Drop Desktop\Watch\Template\RoyalMailClickAndDrop.xslt |  |
| 27 | Click OK and restart Connect | 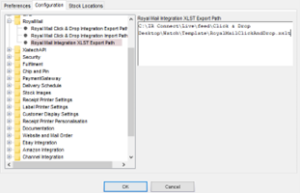 |
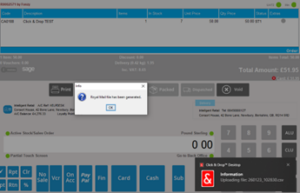
| 28 | For a transaction to be uploaded to Click & Drop automatically from Connect it must be processed in ‘Sales Order’ mode and the ‘Packed’ button must be clicked. Going straight to ‘Dispatched’ will avoid a Click & Drop file being generated.
This is by design and allows you to create a sales order transaction without sending the information to Royal Mail Click & Drop should you wish to do so. |
 |
| 29 | When processing orders in the Fulfilment Centre, click on the ‘Generate Royal …’ button at the packed stage so that the Royal Mail file is created by Connect | 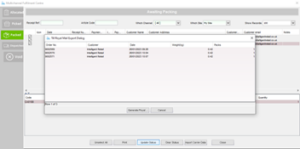 |
| 30 | Once the Connect generated file has been processed by the Click & Drop Desktop application you can process your orders within your RM account | 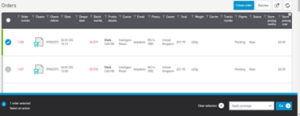 |